
There are several ways to preserve your herbs – making your own herb-infused oil, herb butter, herb salt or seasoning blends. If you have more than enough and not sure what to do with them, the next best thing to do is dehydrate your fresh herbs. Doing so, you will not run out of herbs for cooking. Furthermore, your own dried herbs will have better flavor and aroma than store-bought because they are newer, hence more pungent.
It is relatively easy to dehydrate herbs as most contain little moisture. All you need is air circulation, to remove moisture. When herbs are dried, they are safe from mold and bacteria and may remain potent for at least 6 – 12 months.
Mainly, there are
5 Ways to Dehydrate Herbs
You can either dry your herbs naturally or use an appliance.
Air-Dry
Air-drying is a very common method to dry herbs. Moreover, it is the cheapest and most natural way of preserving your fresh herbs.
There are two ways to air-dry:
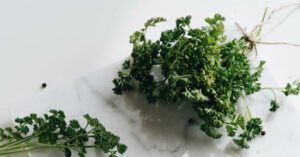
In a bundle indoors. Simply gather 5 – 10 stems in a bunch and tie them up. Do not bundle too many stems in one because proper airflow is needed between the leaves. Moisture trapped will encourage mold to grow. Leaves may rot too. Hang the bundle upside down in a warm dry area away from direct sunlight.
It should take up to 2 weeks for the herbs to dry. You may consider wrapping the bundle gently in muslin or paper bag with several holes to keep out dust. When the herb bundle is dry, remove the muslin or paper bag.
You know the herbs are dry when they have the texture similar to cornflakes and crumble when pressed.
Once dried, remove the leaves from the stems and store them in an airtight container in a cool dark space. Although you can crush the leaves with your clean fingers for storing, whole leaves retain their aromatic oils better.
Alternatively, you can leave the bundle hanging as it is and use the dried herbs as and when needed for cooking.
My bundle of snake needle grass hangs at the kitchen cabinet and I pluck a few dried leaves for brewing tea every now and then.
Flat surface outdoor. You may call this sun-dry but no, do NOT dry herbs under the sun. Spread sprigs of herbs and individual leaves on a rack or baking tray lined with cheesecloth. Place in a warm spot but avoid direct sunlight. Herbs exposed to too much direct sunlight could cause them to bleach. Worse, the nutrients and medical properties may be affected if not destroyed.
The herbs should dry in 2-3 days. Although it is quicker compared to drying in a bundle, you may need to spend some turning the leaves regularly, about 10-12 hours or so.
If you intend to use this method frequently, you may consider getting a herbs drying rack. Designed with a zippered compartment, it ensures all the leaves not blown away. I made this mistake drying butterfly pea flowers on a flat strainer. I only managed to salvage 80% of the dried flowers.

Oven-Dry
Using an oven to dry your herbs is quicker than air drying.
Place herb leaves on a baking tray lined with muslin. A cooling rack works well too as it allows for air circulation all around. The oven temperature should be set at the lowest possible setting. Ideally, herbs should not be more than 100°F. In this case, you have the leave the oven door open throughout the process which could take 2-3 hours.
Take note – turn the leaves after the first 30 minutes. Continue drying for another 30 minutes. After a total of 1 hour, turn off the oven and allow the herbs to cool in the oven. You will know it is ready when the leaves crumble easily.
You may have to experiment with your oven to find the ideal temperature and timing. Check the progress frequently to avoid over-drying or burnt leaves.
There are pro and con using this method. It is quicker but herbs will cook a little, removing some of the potency and flavor. Well, all is not lost. You may just need to use a little more of them in cooking.
Microwave-Dry
By far, microwave drying is the fastest way and it keeps your herbs greener.
Separate the herb leaves from the stems and place them on a microwave-safe plate lined with a paper towel. Cover it with another paper towel. Microwave on high for 1 minute but keep a close eye on the herbs and stop the microwave should you smell the herbs burning. If the leaves are not fully dry, continue drying as 30-second intervals.
This method may take anywhere from 1-10 minutes, depending on the type of herbs and their moisture content.
Microwave-drying is ideal for small quantities of delicate herbs such as cilantro and chives. However, it does not mean you cannot use this method with any other herbs you like to preserve. When you are pressed for time, use your microwave.
Food Dehydrator
Besides the microwave and oven, there is a purpose-built food or herbs dehydrator. Drying herbs in a dehydrator is an efficient way to quickly dry and preserve the flavour and medicinal value of fresh herbs.
Dehydrators have a temperature control mechanism and a fan to circulate air. Most models allow you to dehydrate at a temperature range of 95-145°F. Depends on the herb you are drying, the process may take about 1-4 hours. Still, you need to check your herbs periodically for dryness.
Start by preheating your dehydrator between 95-115°F. Place herbs on the dehydrator trays in a single layer. Small leaves can remain on the stems but it is advisable to remove larger leaves from thick stems to shorten the drying time.
The herbs are dry when the leaves crumble and the stems break when bent. Always allow them to cool before storing to avoid condensation forming.
Advantages of Using a Dehydrator
Drying herbs in a dehydrator allows you to carefully control the temperature and drying time of your herbs without compromising the quality.
Temperature control. The lower the temperature for drying herbs, the better the color, aroma and retention of their medicinal value. Compared to oven-dry, even at the lowest possible setting may not be the perfect temperature and the herbs may cook a little.
Drying time. Using a dehydrator, most herbs can be dried in hours compared to hanging herbs or laying them out on drying racks which can take days.
Cleanliness. If you are worried about dust when air-drying herbs indoor or outdoor, a dehydrator ensures your herbs are dust-free while drying. Once dry and cool, you can store them immediately.
Is Food Dehydrator worth buying?
Of all the drying methods mentioned above, a dehydrator is the most efficient way to dry herbs while preserving the flavor and valuable properties of the herbs. With the controlled temperature of 95-115°F, the drying process takes about 1-4 hours only.
Besides herbs, you can use it to dry fruits, vegetables, berries, nuts and jerky.
Food dehydrators range in price from $30 to $400, and a good unit for home use usually cost $100 to $200. Any home appliances that give you good end results and saves time is worth its costs. Place the dehydrator at a convenient spot and you will use it more often thus regain its cost in the long run.
Should you be interested in getting one, here are a few units to look at.

Under $100
Nesco Snackmaster Pro Food Dehydrator
Comes with 5 trays, this unit has an adjustable thermostat that allows you to dry different foods at the proper temperature 95-160°F

Above $100
Cosori Premium Food Dehydrator
6 stainless steel trays with digital timer and temperature control. This is one of the quietest units available on Amazon.

Above $200
Excalibur Electric Food Dehydrator
9 trays totalling 15 square feet of drying space. Built-in on/off switch with an adjustable thermostat 105-165°F
For more selections, read my review – Best Food Dehydrator for Home Use.

Drying Tips
- Low-moisture herbs are best dehydrated using the air-dry method. For instance, oregano, rosemary, thyme, dill and marjoram.
- Herbs like basil, chives, mint and tarragon are best dried in an oven or dehydrator as they contain more moisture.
- Early morning is the best time to harvest your garden herbs. This is because the essential oils are concentrated in the leaves in the early morning before the sun causes them to be released into the air.
- Do you need to wash your herbs? Usually, it is not necessary if they are grown organically or at your own yard. All you need to do is shake off excess soil, remove old, dead, diseased or wilted leaves. However, should you need to wash them, rinse with cool running water and pat dry with a paper towel.
In Summary
When you have more herbs than needed for cooking, surely you do not want them to go to waste. While you can preserve your fresh herbs making herb-infused oil, herb butter, herb salt, herb-infused honey and seasoning blends or spice rub, you may want to save some for cooking. The best way to keep them is in their dehydrated form.
Related read: Fresh Herbs vs Dried – How to Substitute Fresh Herbs with Dried
There are several methods of drying herbs and air-drying is the easiest and least expensive. The natural and slow drying process ensures the essential oils are retained thus the flavour and medicinal values are maintained.
You can speed up the drying process with the help of appliances such as an oven, microwave and dehydrator. But bear in mind both oven and microwave actually cook the herbs a little, diminishing their valuable contents. A dehydrator is the best option but I understand not everyone has a unit. Do not let this stop you from dehydrating your herbs. Just do what you want to do with what you have.
Which drying method will you be using? Do you think it is worth the time and effort dehydrating fresh herbs? Leave your comment and share your experience with us in the comments section below.
Not Preserving Your Herbs
If preserving herbs is not for you but still, you would like to have fresh herbs throughout the year. The good news is – there are herbs that grow indoors year-round. Read more here.
Or you may want to check this out.
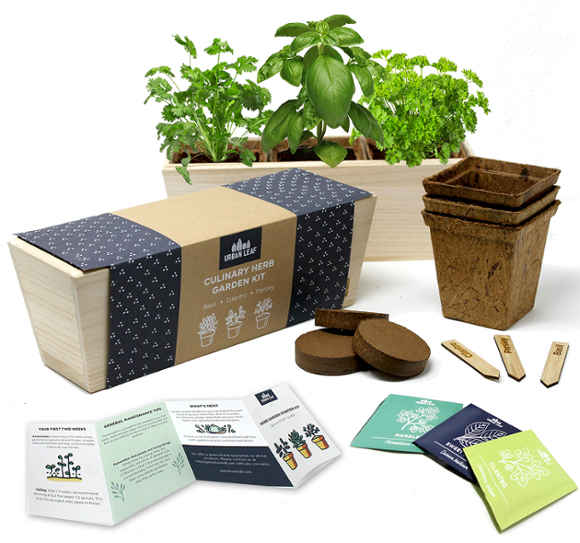
Herb Garden Kit from Urban Leaf
With this kit, you have all that is needed to start growing.
- A reusable planter made from fast-growing renewable timber
- 3 coco coir pots suitable for transplanting should you want to
- Expanding soil discs that include worm castings and water-retaining crystals for long-term plant health
- Bamboo labels
- 3 packet of seeds – basil, cilantro and parsley
- Free access to Urban Leaf web-based app (no download required) for step by step setup and maintenance guides
The wonderful part is all Urban Leaf products are backed by their Green Thumb Guarantee. If you are not satisfied with their products, or cannot get them to work, they will refund or replace them for free. This statement is posted all over their website. So, you need not worry.
Share this article. If you find this blog post interesting, please share it with anyone that you think might find it useful. Thank you and have a beautiful day!
From the Corner of My Home – Spice Up Your Life with Herbs and Spices
Disclosure: This blog post may contain affiliate links as part of the Amazon.com Services LLC Associate Programs and other affiliate services. This means that cornerofmyhome.com receives a small commission by linking to amazon.com and other sites at no extra cost to the readers.
Thanks for sharing such a wonderful information about how to dehydrate herbs! I have planted a lot of herbs over this pandemic and now fall is here so I am trying to salvage them as much as I could. That is amazing that I can preserve them up to a year and they will have a better aroma than the store bought 🙂 I am debating between the air dry but the sun dry until I saw the microwave dry!, who knew we can do that! Thanks for sharing all these tips.
You must have a lovely garden of herbs! The microwave dry is so easy, right? If you are using this method please be careful not to overdry your herbs. Check frequently between shorter intervals.
Happy preserving your herbs!
Well, I had very little to no knowledge about how to ensure proper dehydration of herbs and seeing all you shared here, I will like to ensure that I can replicate this too. Herbs are really helpful and a more better way to.ensure better healing so, I prefer taking them in most cases. So, seeing all.you shared here, I woudnt mind to engaged in this too
Hey Nath. Thanks for dropping by and letting us know how you feel about using and dehydrating herbs. Good day!